Showing posts with label Recipe. Show all posts

Friday, June 28, 2013

Oven Roasted Wild Turkey Breast

After shooting a turkey, I learned there is an important decision to make after taking a picture with it and checking it in. Are you going to pluck the bird and roast it whole like on Thanksgiving or are you going to break it down? One risk you run in to breaking down the bird is drying out the meat while cooking it as it no longer has the skin and fat on it to help seal in the natural juices of an already very lean bird. I chose the latter of the two and very quickly broke down the bird. One reason I chose to do this was because over the past few years I have accumulated many different recipes and ideas of how I wanted to prepare/cook my first wild turkey. I was able to get an abundant amount of meat from this bird which supplied me with enough meat to try a variety of these recipes.

Never preparing wild turkey before and hearing some of the horror stories I asked a few friends and did a little research to find out what the easiest and tastiest recipe would be for my first with this bird. With any recipe I get, I had to tweak, change, and just never leave well enough alone so this is my variation of oven roasted wild turkey breast.

Ingredients
  • 1 – Whole Turkey Breast
  • 8 oz. – Italian Dressing
  • 1 Cup – Butter
  • ½ Cup – Olive Oil
  • Camp Dog Cajun Seasoning (Creole Seasoning will work also)
  •  Ground Black Pepper
  • Ramp Powder (Onion/Garlic Powder will work also)
  • 1 –Reynolds Oven Cooking Bag (Small)


Place turkey breast and the Italian dressing in a container or Ziploc bag to marinade overnight. Make sure the breast is fully covered with the marinade, if not you will need to turn the breast so that both side have had time to marinade. This step is used to help keep the breast moist while cooking it and to provide a flavoring throughout the breast after it is cooked.

After the breast has had time to marinade, remove the turkey breast from the marinade and discard the remaining marinade as it will not be used for anything else.

At this point this point the turkey breast should still have some marinade on it. There are two methods that can be used. The Camp Dog, pepper, and ramp powder can be sprinkled on the top of the breast for quick application. The second method is to mix the seasonings together in a bowl and then to rub down the entire breast with the seasonings to make sure there is maximum coverage of the turkey breast.

Once the breasted is seasoned, transfer it in to a Reynolds Oven Cooking Bag.

Before sealing the bag, melt the butter and mix it with the olive and then pour it in the bag also.
After adding this seal the back and place it into a cake or loaf pan, use whatever size you see fit for the amount of turkey being cooked. Make sure to read the cooking instructions for the cooking bag you are using.

Finally bake the turkey breast at 350⁰ for an hour to an hour and a half.

As I said before, it is just that easy! It might not be culinary masterpiece, but it sure will impress your friends and family!

Friday, May 18, 2012

30/30 Marinade

Now don't get me wrong, I love the pure taste of venison more than anything. I had a conversation with one of my uncles a few days ago about how I don't mix anything into my deer burger when I make it. I do that because I like love the taste of venison. With that being said though, I like to change things up from time to time and marinade my venison steak or any steaks  in my homemade 30/30 Marinade. This is a great marinade to use if you are processing a deer and want to have some fresh venison, this is exactly what I did last fall when  I took my first deer with a bow. It also works great for a normal marinade for when you have some buddies coming over! You might be left wondering why it is called the 30/30 Marinade though, it is simply because it only takes thirty seconds to make it only needs 30 minutes of marinading before you grill/cook it.

Ingredients
  • Wet 
    • 1/2 Cup - Soy Sauce
    • 2 tbsp - Worcestershire Sauce
    • 1 tbsp - Teriyaki Sauce
    • 1 tsp - White Wine Vinegar
  • Dry 
    • 1 tbsp - Brown Sugar
    • 1 tsp - Ground Black Pepper
    • 1/2 tsp - Garlic Powder
Step One: Combine all the wet ingredients into a small mixing bowl and stir to mix.

Step Two: Add the brown sugar to the mixture and continue to stir. Make sure brown sugar dissolves before adding the rest of the dry ingredients. 

Step Three: Pour marinade over meat and let sit for a minimum of thirty minutes but you can allow for this marinade to sit for up to six hours in the fridge. 


Friday, April 13, 2012

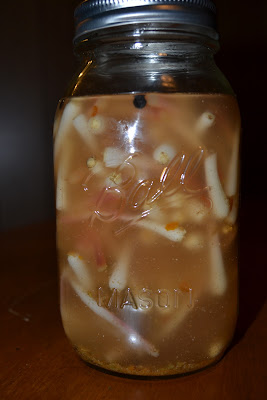
New & Improved Pickled Ramps

The New & Improved Pickled Ramps
For those of you that have been following this blog for a while know that about this time last year I was looking for a way to persevere my ramps longer. While on a fishing trip last year I found a way but for more on that story you can read it here. After doing some brief research I found a recipe, from none other than Martha Stewart, for Pickled Ramps. This was the recipe I used last year, it was good but I thought with more research, asking some friends, and a little tweaking on my part I could make it better. That is exactly what I did and here it is:

Ingredients:
  • +/- 2 lbs Ramps (Cleaned up and trimmed with only the stem and bulb intact)
  • 1 cup White Wine Vinegar
  • 1 cup Sugar
  • 1 cup Water
  • 1 teaspoon Mustard Seed
  • 1 teaspoon Coriander Seed
  • 1 teaspoon Fennel Seed
  • 1 teaspoon Black Peppercorns
  • 1 teaspoon Crushed Red Pepper
  • 1 tablespoon Kosher Salt
Directions:

Step One: Blanch the ramps for thirty seconds to a minute.

Step Two: After blanching the the ramps, drain them and place them into previously prepped mason jar(s). I prefer to use pint jars as this recipe will roughly four full pint jars, but any size jar or jars will do. Also to add a little more favor, at this point I add one whole dried chile pepper to the jar as well as the ramps.

Step Three: Combine the vinegar, salt, sugar, and water in a saucepan and bring to a boil.

Step Four: Add the crushed red pepper, mustard seeds, coriander seeds, black peppercorns, and fennel seeds to the boiling pickling brine.

Step Five: Pour the pickling brine over the ramps in the mason jar. At this point there are two choices to make, you can seal the jar(s) and place them in the fridge to cool and you can continue with the proper "hot bathing" technique. If placed directly into the fridge they will last for a few week up to a few months, if properly canned they can last substantially longer.


Wednesday, April 11, 2012

Cash's Ramp Salt

Ramps straight out of the food processor.
Almost two weeks ago now I took to Twitter with a question of what else could I do with all the ramps I had dug. I know a lot of different ways to cook them in entrees or side dishes or even preserve them, but there is always something new to learn and try and that is exactly what I found. I had always thought and wondered about dehydrating ramps but never followed through. Come to find out this isn't something that abnormal. A reader, @Cashwv06, started tweeting with me and asked if I had tried "Ramp Salt," this is something I had not  tried or heard of. There was only one thing left to do, get the recipe and try it. To say the least this is a very simple recipe but it has limitless possibilities. I have already used this on steaks, pizza, popcorn, and even my eggs.


Ingredients:

  • 1 part Salt
  • 3 parts Processed Ramps


Directions:

Step One: Dehydrate previously cleaned ramps. This part is to be used as a guideline, I dehydrated my ramps (four trays) for eight to ten hours at 125 degrees.

Step Two: After ramps are crisp to the touch, transfer them to a food processor or blender. Proceed to process the ramps until they are a powdered / finely crunched mixture. If there any large pieces or debris left in the mixture remove so that it will not be in final mixture.

Step Three: Combine three parts of the processed ramps to one part salt (Example - I mixed 3/4 cup of ramps with 1/4 cup of salt). Mix together thoroughly and store to use on everything! I prefer to store mine in a pint jar which makes for easy access but most anything that is air tight will do.


Tuesday, April 10, 2012

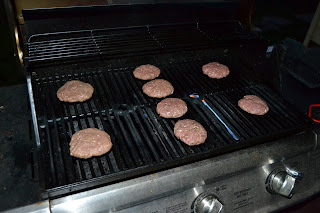
Spicy Ramp Burgers

It's a little messy but it's our
makeshift fishing kitchen.
- Cheat River, Preston County, WV
As I wrote about yesterday, the ramps around here were ready a lot sooner than normal. This week will be filled with the recipes I listed yesterday as well as a few pictures. First on the menu this week are my Spicy Ramp Burgers, they were taste tested on a fishing trip a few weeks and to say the least there was not any leftovers. But there were a few complaint of being to full to continue fishing. I'll take that as a complement / approval. If you remember last year, I made traditional "Ramp Burgers," this recipe is very similar but I promise it will give a new flavor to an old favorite nor will it dissapoint.

Ingredients
  • 1 lbs. of Ground Beef or Venison
  • 3 to 5 Ramps (bulbs, stalks, and greens included)
  • 1 Large or 2 Small Jalapeno Pepper(s)
  • Salt & Ground Black Pepper (Preferred Amount)
  • 1 teaspoon - Ground Sage
  • 1 Tablespoon - Worcestershire Sauce

Step One: Mince or finally chop the ramps (bulbs, stalks and greens) and jalapeno pepper(s)** and add to a large mixing bowl. 
**- To reduce the heat/spiciness of the burgers you can remove the seeds from the pepper(s) before mincing them. I have done this both ways, with the seeds removed there is more of a smoky, warm flavor while leaving the seeds in does provide a little more tangy, kick to the burgers. This is all based on personal preference of those eating the burgers and yourself.
Step Two: Combine the minced ramps and peppers and ground beef or venison to a mixing bowl and mix together. 

Step Three: Add the Worcestershire sauce, ground Sage, and Salt and Pepper to burger mixture. Mix until mixture is blended thoroughly.

Step Four: If needed you can make these burgers immediately, but for the best flavor allow the mixture to sit/marinade in the refrigerator for six to twelve hours. 

Step Five: Make into burger patties and grill/cook. If choosing to make these into Cheeseburgers,  Pepper Jack Cheese is recommended.
Additional Quick Tip: If make these or any burgers to-go, I always like to pre-make my patties and separate them with parchment/wax paper and place them all in a container in the cooler so that there is one less step to worry about at meal time nor is there anywhere near the mess to deal with along the riverbank. 

Monday, April 9, 2012

Early Ramps 2012

With an early spring, it has brought out the ramps roughly a month ahead of last year. Last year it wasn't even until April 10th when Cassie and I took Buster on a hike and started checking for ramps.  To date (this year), I have already attempted three new ramp recipes and  also made a few favorites for dinner (Cassie's Ramp Potatoes and Ramp Burgers). If you are new to this blog or have heard me rambling on twitter about ramps and are still questioning what they are you can find out more about them here in my previous post, " All Ramped Up!".

A few new recipes to look for this week:

  • Spicy Ramp Burgers
  • Cash's Ramp Salt
  • New & Improved Pickled Ramps

Wednesday, December 14, 2011

Girl Hunter: Revolutionizing the Way We Eat, One Hunt at a Time By Georgia Pellegrini

Earlier this spring I got an e-mail from none other than Georgia Pellegrini, at this point I was ecstatic, I didn't care what the email said. After opening it, I found out she was releasing a book this winter and wanted me to get an advanced copy. To say I was flattered was an understatement. Now let me take a step back and explain my level of excitement. For those of you who read this blog, know I am a big burly man that normally has a bow, gun, or fishing pole in my hand and this blog chronicles those events, but no ones how close this blog came to resembling the blogs of Georgia Pellegrini or Hank Shaw because as at home as I am in the woods the kitchen isn't a far second. Both of these people heavily included my ideas for a blog, and have partial credit for me starting Foggy Mountain Meanderings. So to receive an e-mail asking me if I'd like to have an advance copy of Georgia's book was one of those things you couldn't even ask for or imagine when you start blogging.

After the book arrived it didn't take long for it to find a spot in my hunting pack, actually it when straight from the mailing envelope directly into my bag for the next mornings hunt. It didn't take me long to breeze through the book the first time as I could barely put it down. I was actually long for me to find myself enthralled with the book, but with being in school I knew I had to leave it in my hunting pack so I could only read it when I was hunting. A sad fact, I was so entrenched while reading this book, the buck that I shot on opening day of rifle season made it half way in behind me before I looked up from the book, but that one still turned out for the best. This book is a must read for any hunter, actually, it's a must read for anyone. It shows what hunting is truly about and the values that most people don't see in today's world of hunting. This book has opened my eyes, even as a hunter, it has made me want to strive to hunt new types of game and expand my horizons in the kitchen. The chapters are laid out wonderfully with a short story of her hunt trip and then concludes with a handful of recipes for the selected game in that chapter. Georgia was nice enough to share one of the recipes from her new book released yesterday. Here is a great recipe that I recommend everyone and anyone needs to try!


Buttermilk Fried Rabbit

Serves 4

Also try: chicken, turkey, squirrel, dove, upland game birds, or any other young game meat

1 young cottontail rabbit, cut into serving pieces
2 cups buttermilk
1 medium-size onion, sliced
3 garlic cloves, diced
1 teaspoon dried oregano
1 teaspoon dried thyme
1 teaspoon dried tarragon, or 1 teaspoon each of your three favorite dried herbs
1 teaspoon smoked paprika
1 tablespoon cayenne
2 cups all-purpose flour
1 teaspoon garlic powder
1 teaspoon onion powder
Salt and pepper
2 to 3 cups grape seed or vegetable oil

1. Soak the rabbit overnight in the buttermilk, along with the onion, garlic, herbs, paprika, and 1
teaspoon of the cayenne.

2. Drain in a colander, leaving some herbs on the rabbit. In a large resealable plastic bag or in a
large bowl, mix the flour with the garlic and onion powder and remaining 2 teaspoons of cayenne,
as well as a pinch of salt and pepper. Meanwhile, heat the oil in a large, heavy-bottomed skillet
over medium-high heat until a pinch of flour starts to sizzle when dropped in the hot oil, but not so
hot as for the oil to be smoking.

3. Place the rabbit pieces in the bag with the flour mixture and shake until thoroughly coated. Do
this in small batches, dredging just enough rabbit to fit in the pan at one time.

4. Add the rabbit to the skillet and fry on one side for about 10 minutes, until golden brown, then
use tongs to turn the pieces over and fry for another 10 minutes, again until golden brown. Be
careful to keep the oil hot enough to fry the rabbit, but not so that it burns.

5. Remove the rabbit from the skillet and place it on a wire rack over paper towels. Season
immediately with salt and pepper to taste, to help preserve the crispiness for the table. This is
good served immediately or also good cold for lunch the next day.

From the book Girl Hunter by Georgia Pellegrini.  Excerpted by arrangement with Da Capo Lifelong, a member of the Perseus Books Group.  Copyright © 2011.

For more on Georgia and her book...


Friday, August 12, 2011

Pickled Hot Dogs and Banana Peppers

Since I can remember hot peppers have been a staple around my parents house and now mine. The reason why is a simple one, my dad loves them. He will eat anything that involves hot pepper, hot sauces, or any form of hot spices period and has the collect to prove it. With that being said, it isn't surprising that a third of my garden is devoted to peppers, everything from sweet Bell peppers to very hot Habanero peppers and everything in between. The only problem with that is that it leads to having an abundant amount of peppers which leaves me trying to figure out what I can do with them. After taking up canning last year, I figured what better way to start preserving some of the banana peppers than making some Pickled Hot Dogs and Banana Peppers.

This recipe will yield 4 Pints jars, but can be adapted 
to yield other quantities.


Ingredients:
  • 2 Cups White Vinegar 
  • 2 Cups Sugar
  • 2 Cups Water 
  • 1/2 Tbsp Alum 
  • 1 1/2 Tbsp Pickling Spice
  • 4 Cloves of Garlic / 1 per Jar (Optional)
  • Hot/Sweet Banana Peppers
  • 16 Regular Length Hot Dogs

There are a few steps when making these:

Cold Packing the Jars:
  1. Have your clean jars in front of you as you begin to cut up the hot dogs and peppers. I prefer to half the hot dogs and place two halves on the bottom of the jar first. Then I proceed to thinly slice the peppers into rings and then layer them. Then continue alternating the hot dogs and peppers until there is a generous inch of head space left in the jar.

Making the pickling brine:
  1. Combine the White Vinegar, Water, Alum, Pickling Spice and Sugar into a medium to large sauce pan and bring to a boil allowing the sugar to dissolve.

Combining and "Bathing" the jars:
  1. Add pickling brine to the cold packed jars, still leaving 1/2 to 3/4 inch of head space.
  2. Clean rim of jar with a rag to remove any liquid or debris.
  3. Apply lid and rings and place in "hot bath" for 15 minutes. 
  4. Remove and place in a cool dry area to cool down.
Enjoy!!

Thursday, August 4, 2011

Stuffed Zucchini

Side view after it had been cut.
This idea started while I was still at the beach, I was reading an issue of Grit magazine when I came an article on what to do when you have to many or to big of zucchini. The one that stood out the most was the Stuffed Zucchini. After returning home and seeing I had quite a few large zucchini this recipe was a no-brainer! It turned out better than I had expected with the zucchini being very tender and the stuffing had prefect favoring to match it.


Ingredients: 
  • 1 zucchini, 12 to 18 inches
  • 1⁄2 to 1 pound ground beef or meatloaf mix (equal amounts beef, pork and veal)
  • 1 can (14 to 16 ounces) corn, drained, or 1 box (16 ounces) frozen corn, thawed and drained, or leftovers (any amount) from corn on the cob
  • 1 onion, chopped
  • 1 green pepper, diced
  • 1 tomato, chopped
  • 3 to 4 eggs
  • 1 box stuffing mix
  • Black pepper or crushed red pepper to taste
  • Grated or sliced mozzarella cheese
**When I made this, the said amount of ingredients made enough stuffing to stuff four halves of 14 inch zucchini, so do some experimenting to find out how much it'll make for you.**
  1. Heat oven to 350°F. Grease 9-by-13-inch baking dish; set aside.
  2. Wash zucchini and place on cutting board. Cut off each end and slice zucchini in half lengthwise. Use tablespoon or serving spoon to scoop out seeds and make a hollow in each half. Place, hollow side up, in prepared dish.
  3. In large bowl, combine remaining ingredients, except cheese. Spoon into zucchini hollows. Add water around zucchini to 1-inch depth.
  4. Cover dish with foil, and bake for 1 to 2 hours, or until zucchini is tender.
  5. Remove foil, and top each zucchini hollow with cheese. Bake for an additional 10 minutes, or until cheese is melted.

Thursday, April 28, 2011

Cassie's Ramp Potatoes

This past week we have been making a lot of dishes with ramps because I picked so many last time I was out. Cassie even got involved with cooking an amazing side dish, so I couldn't resist asking her to do a guest post. So without further ado...

A few weeks ago Justin brought home a 5 gallon bucket full of ramps.I was really excited until he asked me to help him cook some. Now, don't get me wrong, I love ramps, when someone else cooks them. This year is my first time cooking ramps for myself let alone someone else. Luckily, I have consumed enough ramp recipes to have a basic idea of what to do with them.  My favorite way to eat ramps is fried up in some 'taters. So I tweaked a generic online recipe to make a pretty tasty side dish, if I do say so myself. 

Ramp Potatoes

  1. Preheat oven to 350
  2. Grease a cake pan with a little EVOO
  3. Wash a half bag of red potatoes, then cut them up into quarters
  4. Dice up 2 green peppers
  5. Cut up and dice 10-15 ramps (depends on your preference), I left some of the green leafy parts in the dish per Justin's request. I personally like leaving them out, but they aren't bad. How small you dice the ramps is another personal preference. I like mine small and bite size so that's what I did.
  6. Combine all ingredients  and place into greased cake pan
  7. Salt & pepper to taste
  8. Drizzle 3 tablespoons of EVOO over the ingredients and bake for 45 mins or until the potatoes are tender.


Ingredient List
  • 2 green peppers
  • 1/2 bag of red potatoes
  • EVOO
  • 10-15 ramps
  • Salt 
  • Pepper

Monday, April 25, 2011

Pickled Ramps

Around this time last year Jay, Skippie, Scott, and I went on an day long fishing trip, one thing you'll learn and I think I even stated in "On the Water: March 19, 2011" is that whenever you go fishing with Skippie, you never go hungry. This lunch was nothing out of the ordinary (Deer steak, potato packets, and corn), but there was a treat this time, freshly pickled ramps. I swore after having those that day I would start making my own once I started canning. This past summer was the first attempt at canning, so you can only guess what that means. I recently went on a trip and picked a five gallon bucket of ramps for friends, family, and myself. I froze some, made some potatoes and ramps, and even attempted to pickled them. I haven't had any experience with them, so I did want anyone would do, I googled how to pickle ramps and none other than Martha Stewart had a recipe for it, so I tried it.


Ingredients
  • 1 cup white-wine vinegar
  • 1/2 cup sugar
  • 1 1/4 teaspoons coarse salt
  • 1 teaspoon whole coriander seeds
  • 1/2 teaspoon fennel seeds
  • 1/4 teaspoon whole black peppercorns
  • Pinch of crushed red-pepper flakes
  • 3 sprigs fresh thyme
  • 10 ounces ramps, trimmed and rinsed well

Directions

Stir together vinegar, sugar, salt, coriander seeds, fennel seeds, peppercorns, red-pepper flakes, thyme, and 2 cups water in a medium saucepan. Bring to a boil. Add ramps; return to a boil. Reduce heat, and simmer until tender, 5 to 7 minutes. Remove from heat, and let cool completely, about 1 1/2 hours. Pickled ramps can be refrigerated in their liquid in an airtight container up to 1 month.


Wednesday, April 20, 2011

Ramp Burgers

As many of you should have been able to tell, I love ramps! If you still don't know what a ramp is, you can find out in my post "All Ramped Up!", it will give you a little more insight. One of my first of many ramp recipes is going to be something simple, Ramp Burgers. Everyone knows how to make a burger or at least has an idea, but I am going to show you how I do without letting the ramps over take the burger.

Meat
  • 1 lbs. of ground beef or venison


Ingredients
  • 8 to 10 ramps (bulbs, stalks, and greens)
  • Pepper
  • Salt
  • Crush Red Pepper
  • Liquid Smoke

Step 1: Go dig a mess of ramps or acquire them at your local Farmers Market (if that is a possibility in your region).

Step 2: Throughly wash the ramps and trim off the roots (and greens if you do not wish to include them). I prefer to include part of the greens into the recipe as they do not have as much favor as the bulb or stalk, but they help spread the flavor throughout the burger.

Step 3: Finely mince the the ramp bulbs, stalks, and chosen amount of greens. I have found that 8 to 10 small/medium sized ramps give the best amount of flavor without overpowering the burger. Then add the minced ramps into the meat and mix into the meat.

Step  4: Add Salt, Pepper, Crushed Red Pepper, and Liquid Smoke to flavor. 

Step 5: Form meat into patties.

Step 6: Throw them onto the grill, cook to preferred doneness.

Step 7: Put on a bun, kick back with a cold beer and enjoy.

Friday, January 21, 2011

Spicy'n'Sweet Deer Jerky

As I said in the previous post "The weekend that wasn't", I made some great deer jerky, if I do say so myself. I've had a few family friends give me recipes and  I've looked up a few on the internet, but over time I have changed it back and forth and created new ones. I personally like spicy things so my jerky is indicative of that, at least this one. It can be made without the things that spicy it up and it is still delicious, I promise. So here is a list of all the ingredients that you'll need and then a step by step process of how to make it. It's not really that hard, but hey, if I didn't also how to tell you how to make it, this would be an extremely short post.

Meat
  • 2 Lbs. of Venison cut into strips

Wet Ingredients
  • 1/3 C - A1 Steak Sauce
  • 1/4 C - Soy Sauce
  • 1/8 C - Teriyaki Sauce
  • 1 Tb. - Liquid Smoke
  • 1Tb. - Sriracha *
  • 1 t - Franks Red Hot

Dry Ingredients
  • 1 t - Paprika
  • 1 t - Garlic Powder
  • 1 t - Chili Powder*
  • 1t - Ground Sage
  • 1 t - Black Pepper
  • 1.5 Tb. - Seasoned Salt
  • Sprinkle (or more if you enjoy the heat) of Crushed Red Pepper*

*These are the ingredients that make the jerky more spicy, they do not have to be added to the jerky.


Step 1: Kill the deer or acquire some venison. Have it cut into strips, I prefer to keep mine around 2"-4" long and 1/4"-1/2" thick.
Step 2: Make sure the venison is thawed and place it in a contain to be marinated.
Step 3: Add the wet ingredients (Noted Above) to the venison, make sure that all the venison is covered.
Step 4: Add the dry ingredients (Noted Above) to the bowl, this is where it can get fun. Roll up your sleeves and dig in, make sure that all the strips of venison are covered. After this is done, you can sprinkle in the crushed red pepper.
Step 5: Seal the container and let the mixture marinated for 12 to 24 hours. I normally let it marinated for a minimum of 24 hours, but I make sure to mix it up at least once if not more in that time frame.
Freshly Mixed.
After 24 hours.
Step 6: After allowing the venison to marinade remove the strips from the marinade and put them directly onto the drying rack of the dehydrator.
Step 7: Turn on the Dehydrator and let it do its magic. The time for this can vary depending on the unit you are using. Mine can take anywhere from four to eight hours.
Step 8: Make sure all strips are cooked throughly, then kick back, eat and enjoy.

Related Posts Plugin for WordPress, Blogger...